Do you have printable personal planner inserts? Or, do you think to have one? For sure you would want to learn how to print personal planner inserts fast and easy. In this article we will guide in a simple and clear way how to print your personal size planner pages. You will know how according to the design layout (portrait or landscape) and the different options available for printing.
If you want to know more about digital printables and their benefits you can read this article about it.
The great thing about printing your own personal planner inserts is you can print as many copies as you want. In addition, you can choose the personal size inserts that are better to suit your needs. This may be for organizing your personal, academic, business or work activities. Here you can check our Personal Size Printable Planner Inserts.
How to Print Personal Planner Inserts?
First, verify the size of your planner is Personal
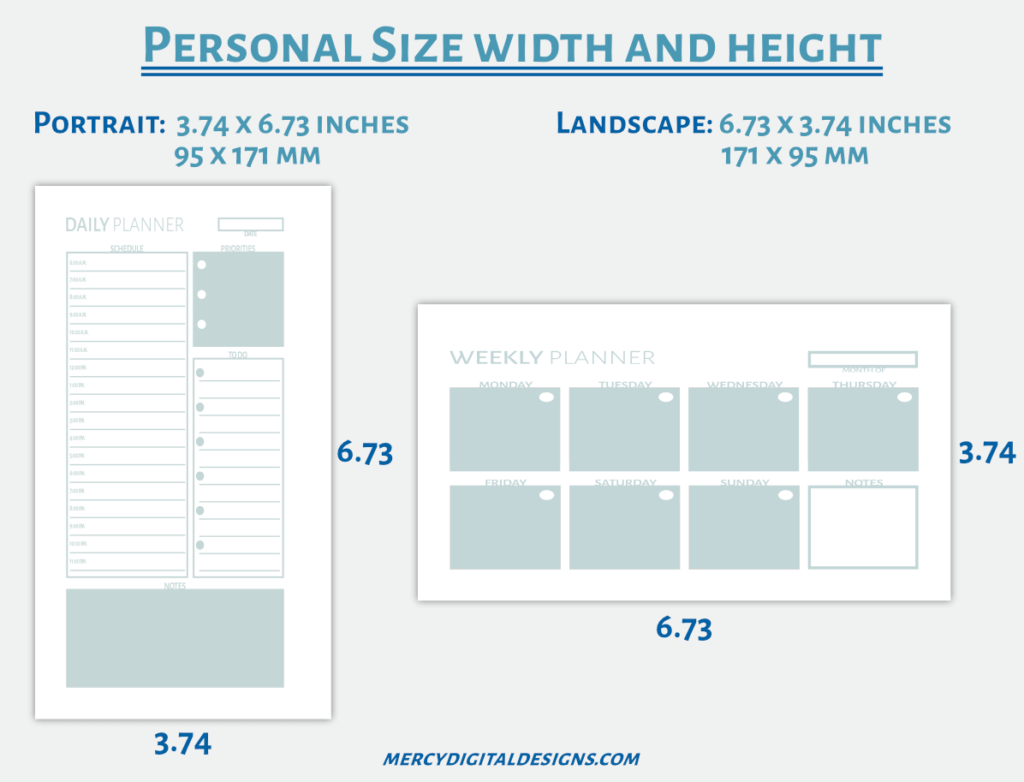
Your Personal printable planner insert shoud have these measurements: 3.74 x 6.73 inches / 95 x 171 mm. It is necessary to verify the size of your planner to choose the paper correctly because if you use a similar size like the A6 the planner could print incomplete.
Second, how to choose the paper according to the format of the Personal planner file?
For exact Personal planner size, use the same size precut paper.
If the file is designed to print in the exact size of the planner, the easiest way it’s to use Personal precut paper for your printable planner insert. Again, for printing in Personal paper, verify the measurements: 3.74 x 6.73 inches / 95 x 171 mm.
For example: you have a printable daily planner in Personal size for printing in precut paper. In that case, you would have to place Personal size paper in your printer tray .
If you don’t have Personal size paper for printing your planner, you could cut it yourself according to its measurements. It would be easier to cut before printing. On the other hand, you could print in your regular Letter or A4 size paper and cut after, but you would not have crop marks or guiding lines for cutting if the document didn’t bring them.
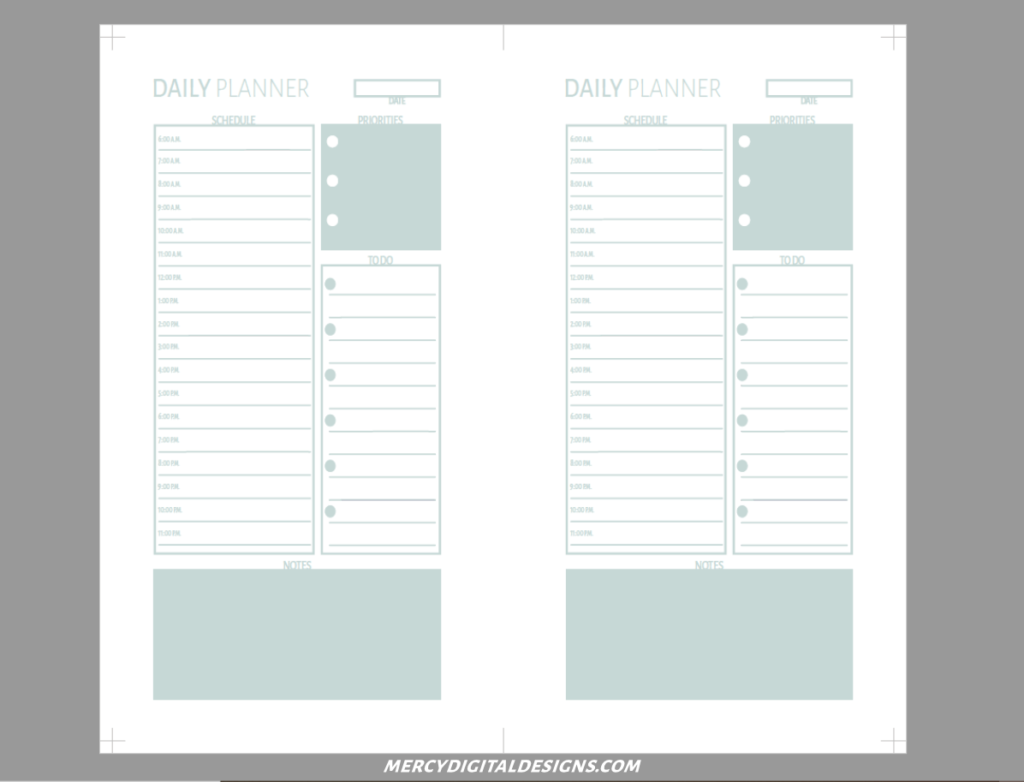
Personal Planner Inserts file with Crop Marks
If the file contains one planner insert per page and it has crop marks, you could use US Letter, A4 or A5 size paper. On the other hand, if the file contains 2 planner inserts per page, you should use A4 size or US Letter size paper.
Third, how to configure the printing options to print the planner?
Go to the print option. Now that you have the correct paper size, look for something similar to select the size. In this case, we are using Adobe Reader for printing our planner.
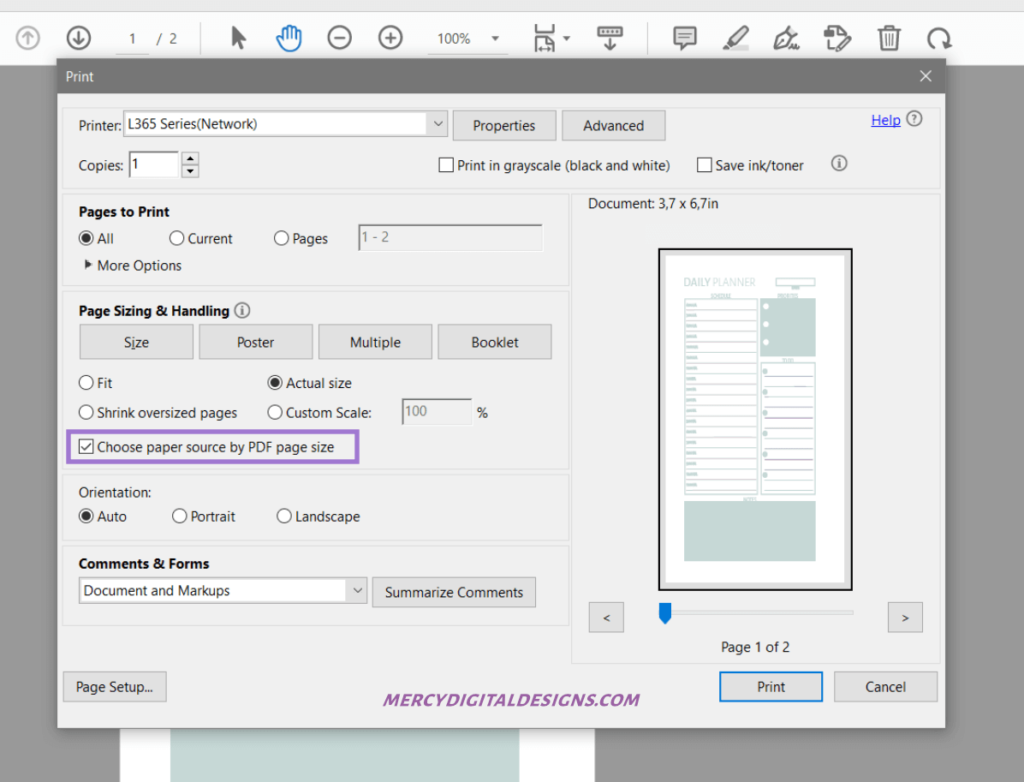
First, if you will print on Personal precut paper, check if your software has the option to ‘choose paper source by PDF page size’. If so, check this option.
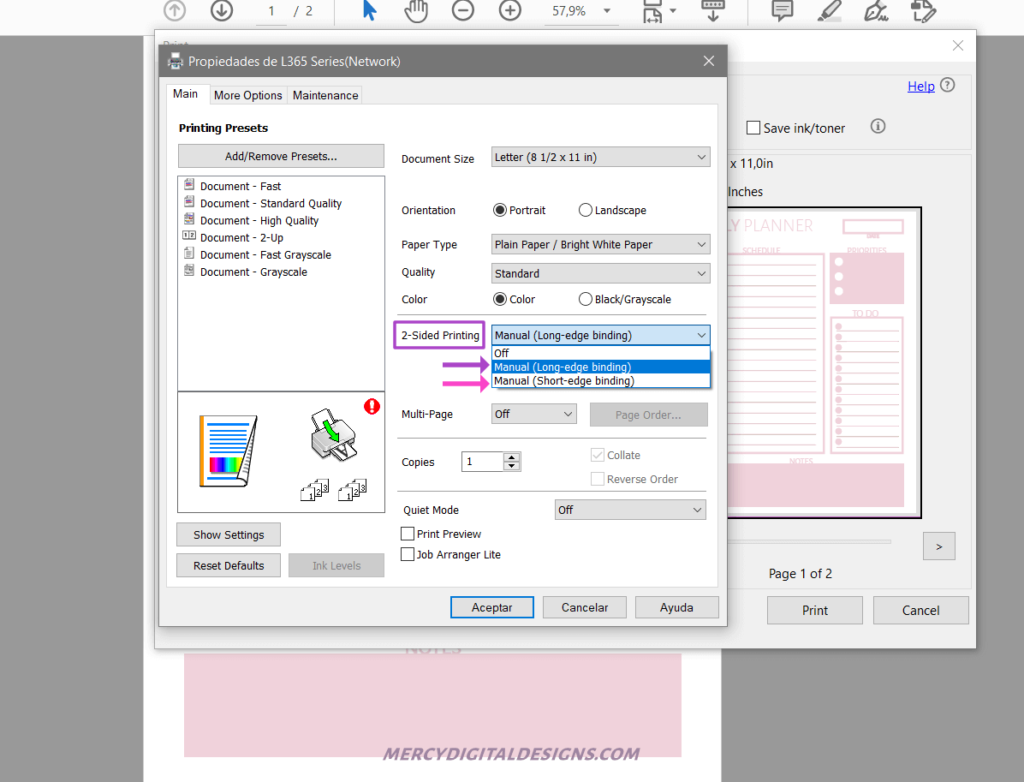
On the other hand, if this option is not available you may look for something similar to properties or settings. In this case, select ‘properties’, next choose ‘size’. If your Personal paper size is listed, select it. If it is not listed then look for an option ‘defined by the user’ and introduce the measurements.
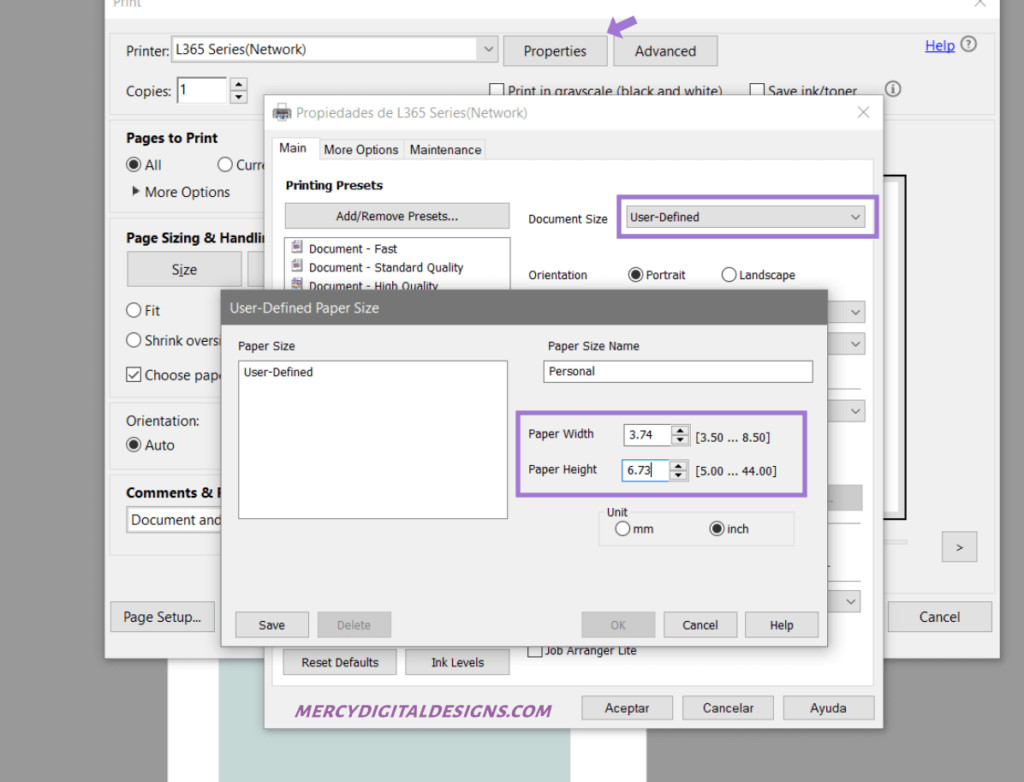
Finally, enter the dimensions of your paper in millimeters, inches or another measure scale available. Accept these options. For example, here we are writing the Personal width and height in inches.
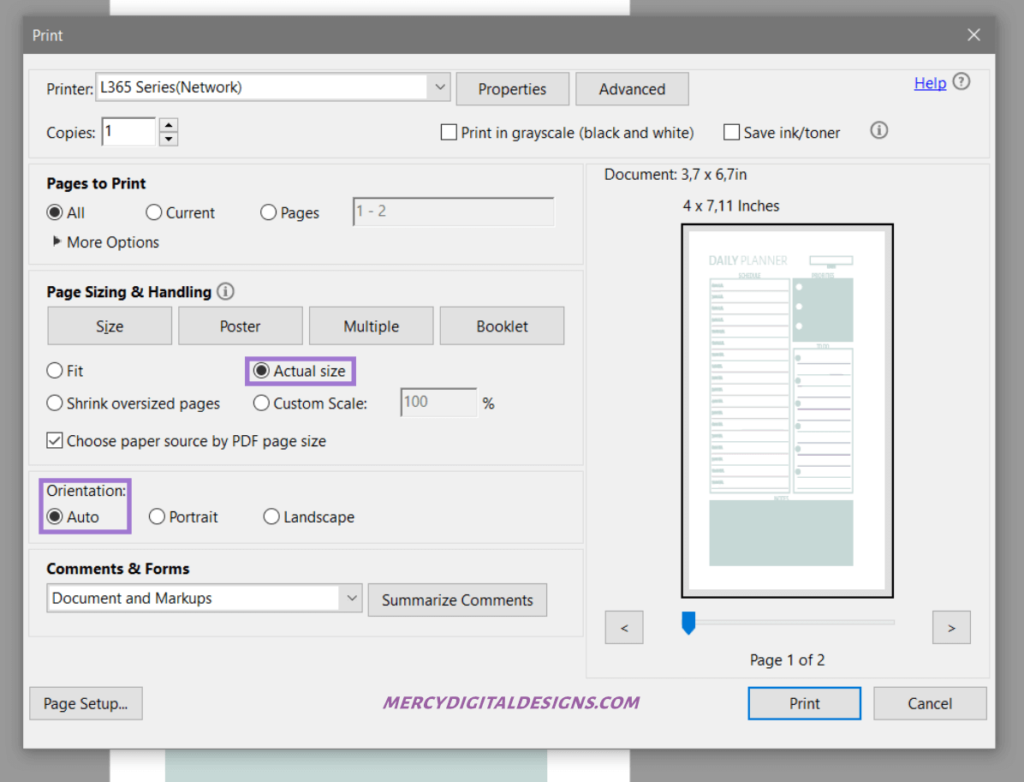
Now, in sizing and handling it is convenient to print the planner in its ‘actual size’ to not lose quality and the planner prints out ‘stretched’. You will find something similar to the next image. Also, select ‘auto’ in orientation.
Tip: is recommended to print in high quality to get a gorgeous planner, but if you want a normal print, it will be beautiful as well.
For printing the planner on one side of the page
If you will only print on one side of the pages, enter the quantity of pages to print, then Print.
How to print Personal planner inserts on both sides of the page (double sided)
In the first place, for printing Personal double sided pages you have to use A4 or US Letter size paper.
On the other hand, for printing on both sides of the pages (double sided pages), there are a few more options to configure.
- Note if the design of your planner in the file has a portrait (vertical) or landscape (horizontal) layout.
Important: it’s the portrait or landscape layout of the file, it is not the layout of the planner.
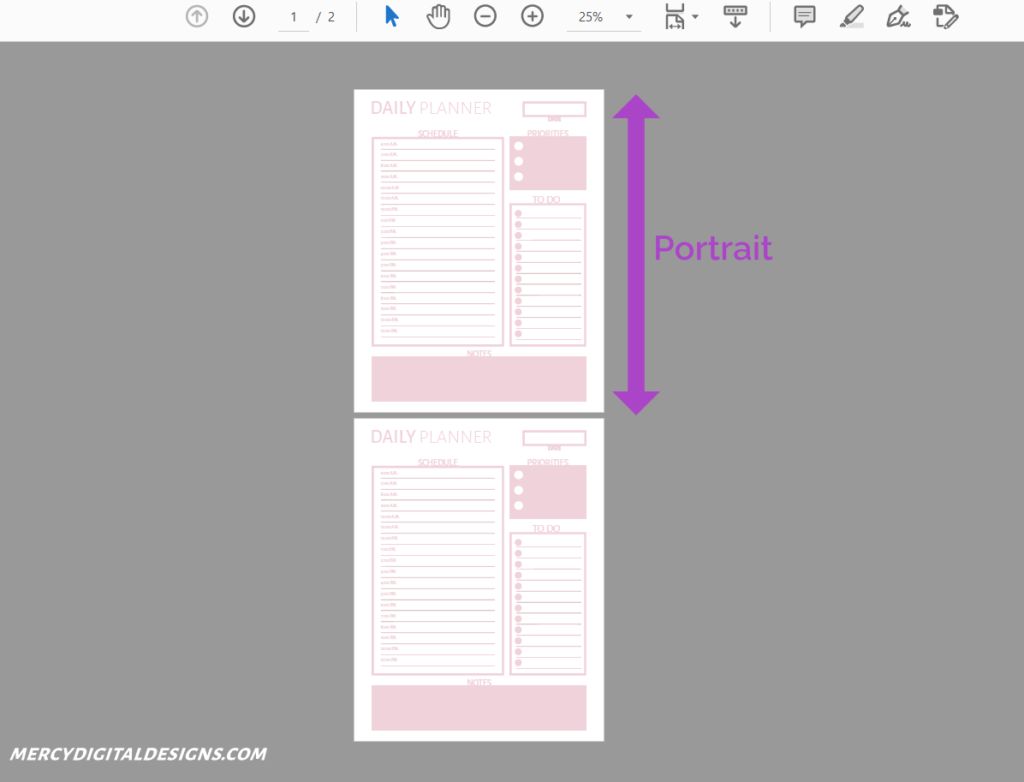
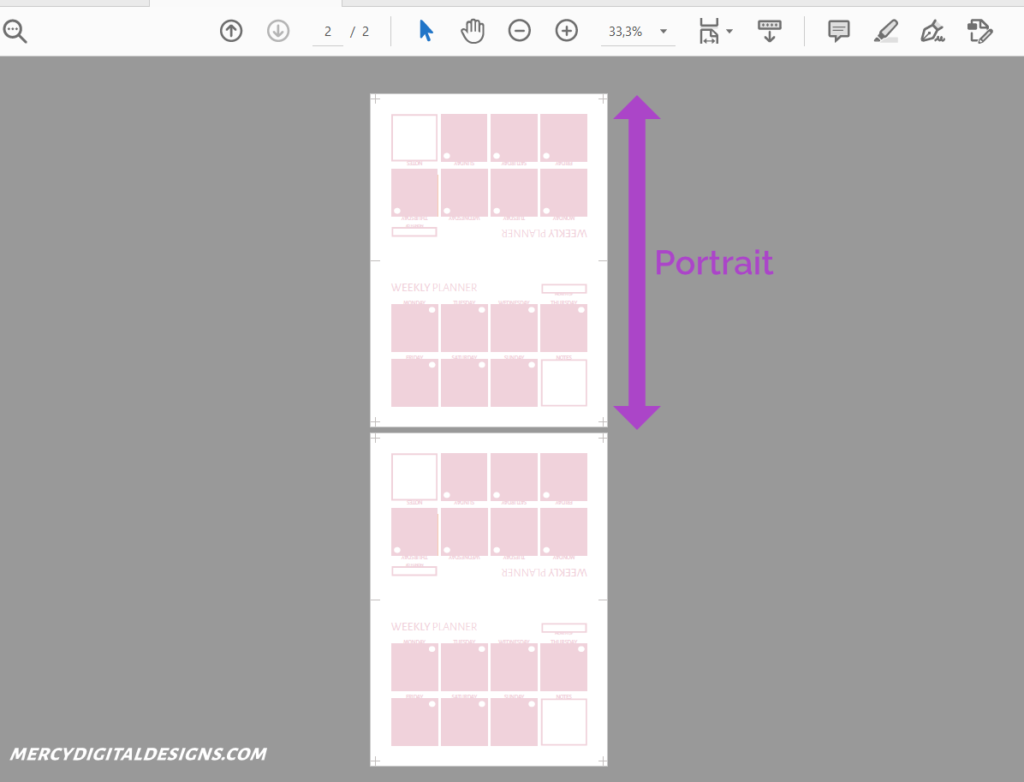
In the case of double sided portrait planners, the planner have portrait layout, but the file has landscape layout, like the image above:
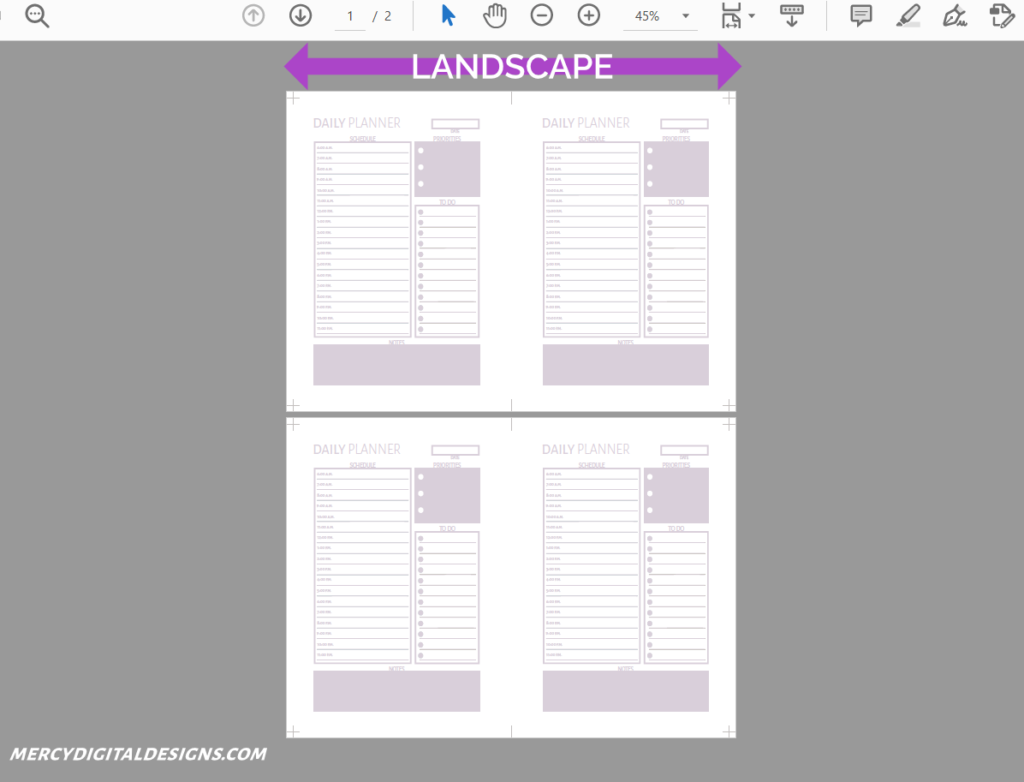
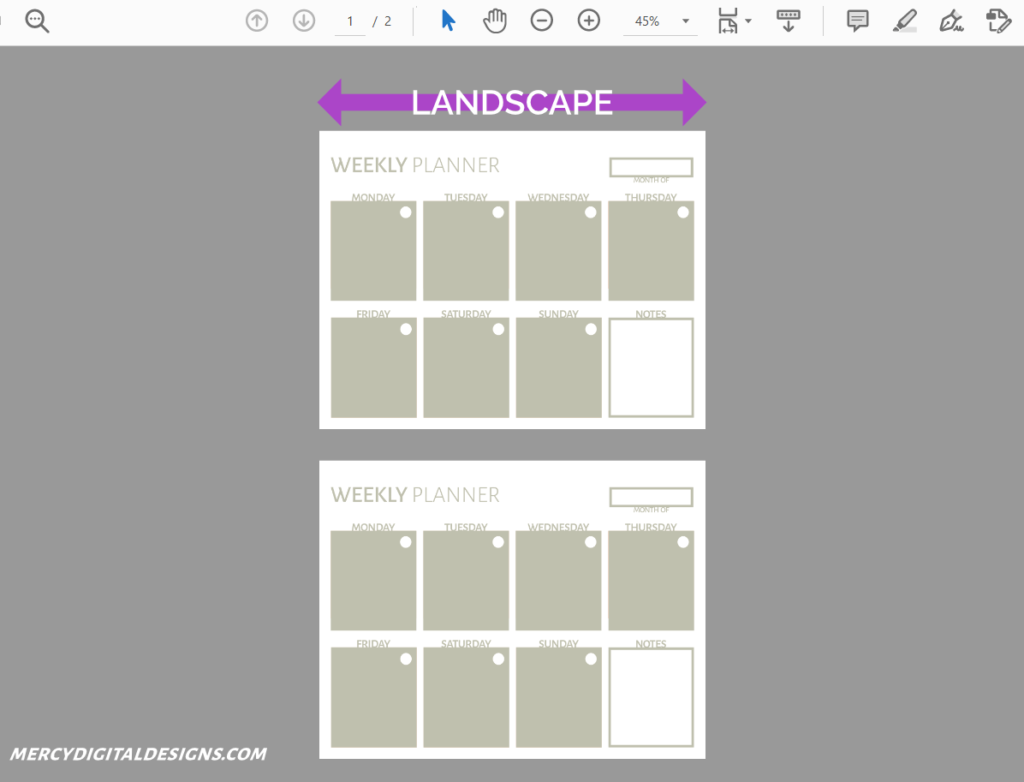
In the case of double sided landscape planners, the planner have landscape layout, but the file has portrait layout, like the image above:
The portrait or landscape layout of the file is the important thing when you have to flip the page to print on both sides of it.
For the planner with only one page in the file:
Take the printed page. If the planner has a portrait layout, flip the long edge of the paper. Then, place it again in the printer tray and print again.
However, if the planner has a landscape layout, flip the paper on the short edge. Now, place it in the printer tray and print again.
For planner with two pages and a portrait layout:
If your printer can print double sided pages, then use this option and select flip on the long edge.
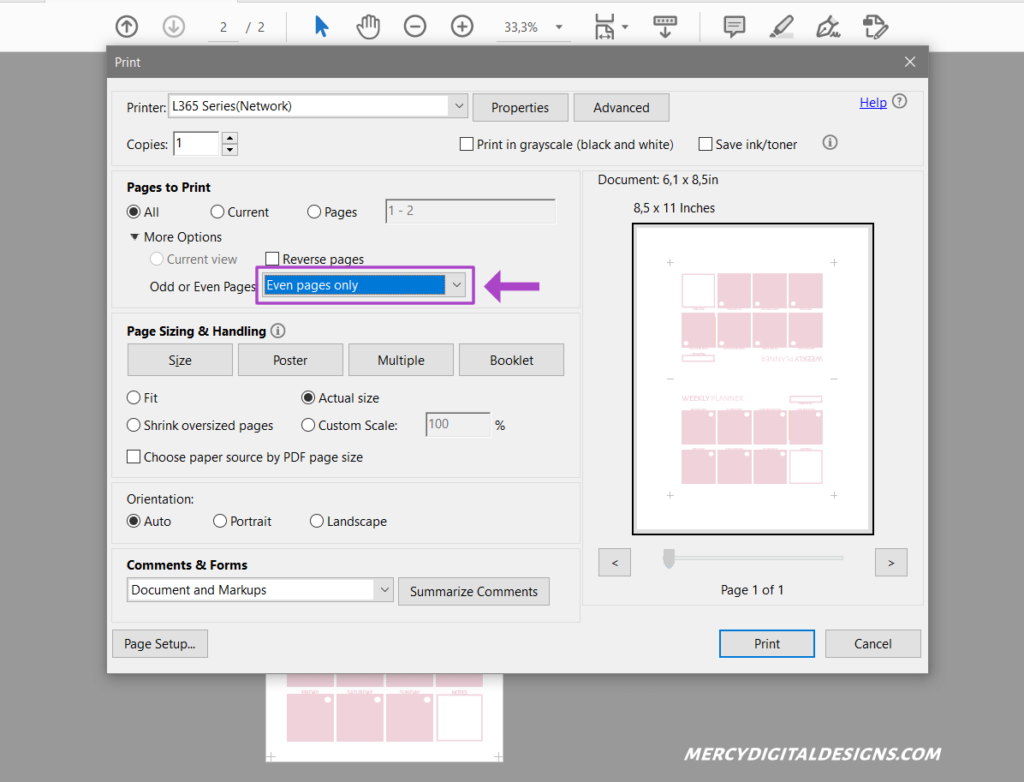
If you have a single-sided printer: On printing options look for print ‘Odd pages only’.
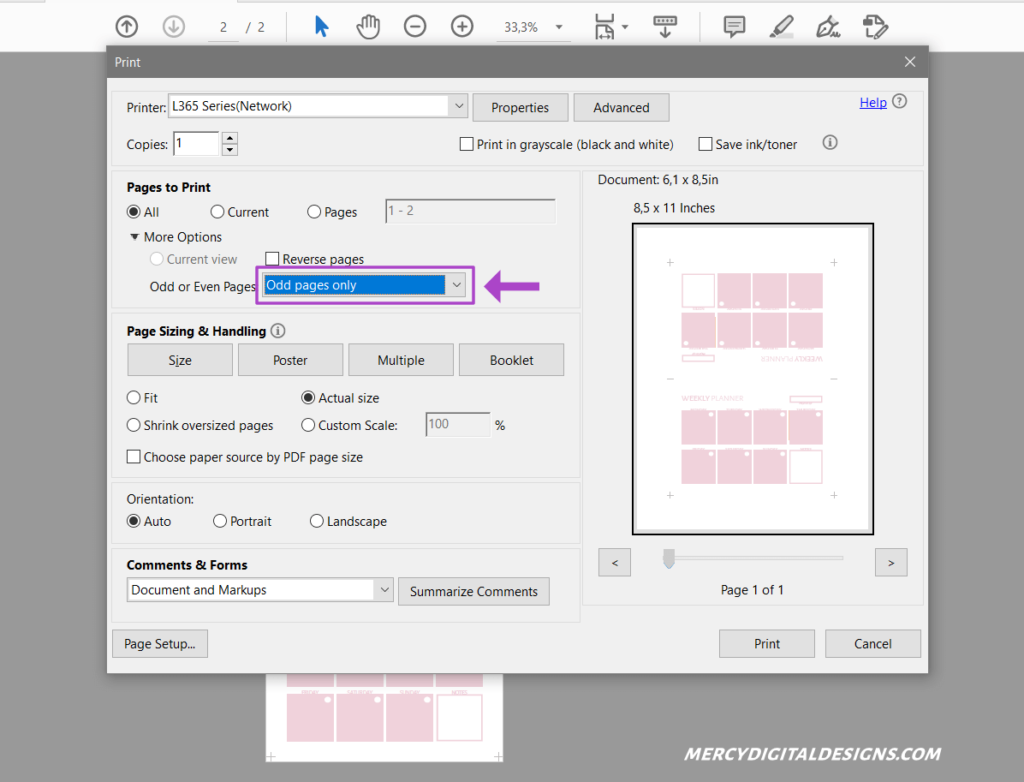
Flip your page or paper stack on the long edge and print again with ‘Even pages only’.
For planner with two pages and a landscape layout:
If your printer can print double sided pages, then use this option and select flip on the short edge.
If you have a single-sided printer: On printing options look for print ‘Odd pages only’.
Flip your page or paper stack on the short edge and print again with ‘Even pages only’.
Our printable planners, except the A4 and US Letter planners, include PDF files with two pages, two pages with crop marks PDF and double sided pages PDF.
And… That ‘s it! Now we have finished printing the Personal planner inserts. Certainly, it’s time for trimming your planner if it is necessary, punch them to insert in your binder or use them in any other way you like. We hope this article could help you to print your planners. For a general tutorial about how to print your planner, read this blog post. If you have any doubt about it you can ask us in the comments section.
You could try some of our planners by getting access to Mercy Digital Designs’ subscriber library.